
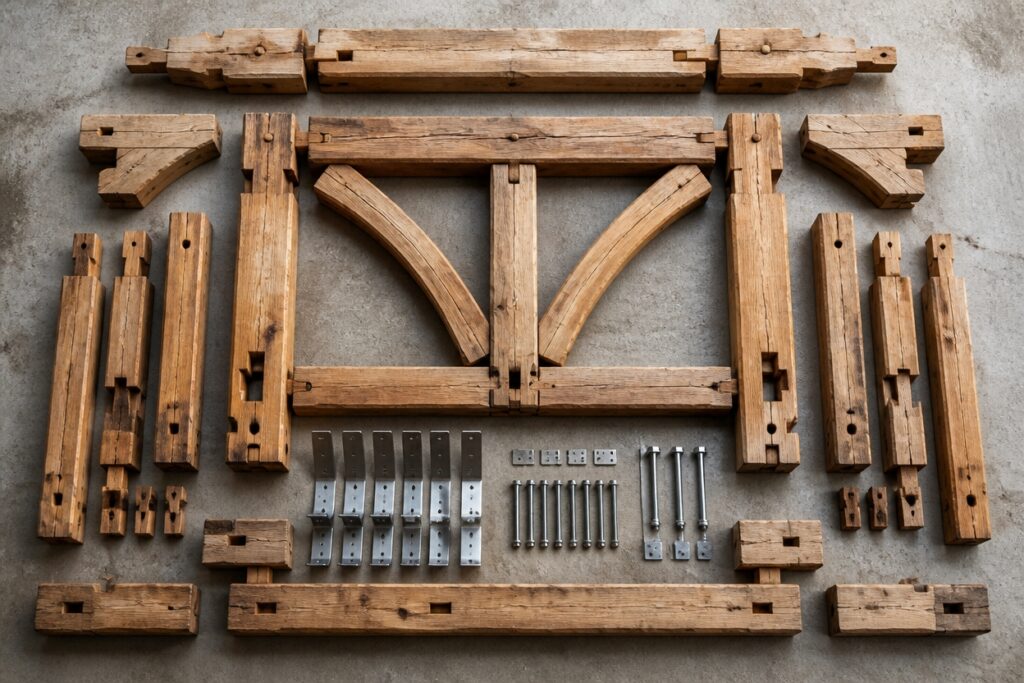
Timber frame pavilion kits promise a streamlined path to that dreamy backyard retreat. Most arrive with pre-cut components, hardware, and documentation already sorted for you.
The structural elements come labeled and ready to assemble, which feels genuinely satisfying.
Still, some essentials remain absent from the box. Foundation preparation, roofing coverage, flooring materials, and weatherproofing options vary considerably by kit and brand.
Knowing what manufacturers include versus exclude helps keep your project on budget and on track.
Foundation First: Site Prep and Ground Requirements
Site Prep and Ground Requirements
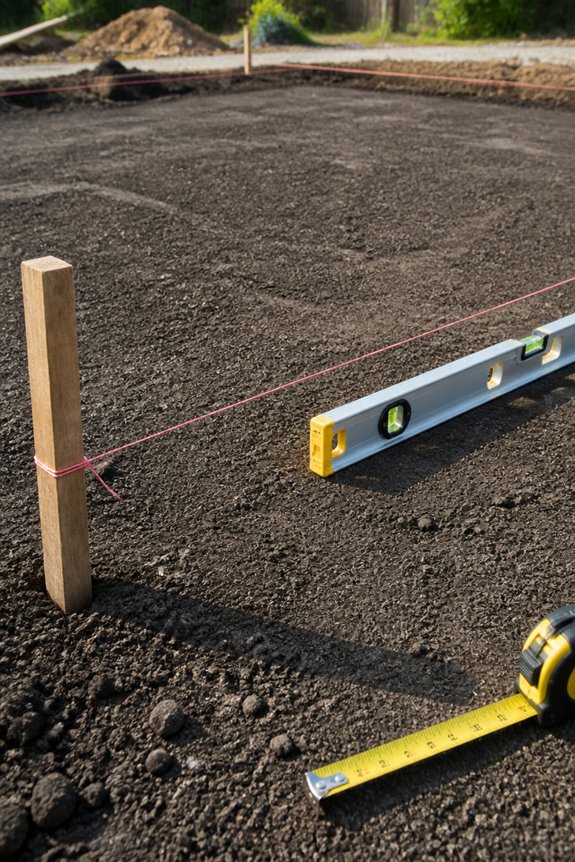
A timber frame pavilion needs solid ground beneath it. Start by checking your soil type, drainage, and slope. These factors shape your foundation plan.
Level ground keeps water from pooling and prevents settling down the road. Clay soil often needs better drainage. Sandy areas usually require compaction work first.
Local codes spell out frost line depths. These typically run 12 to 48 inches based on your climate. Clear away all vegetation, rocks, and debris before moving forward.
Grade the site so water flows away from the pavilion. This simple step protects against moisture damage and keeps your structure stable for years to come.
The Pre-Cut Timber Frame: What’s Inside the Kit
The timber frame kit arrives once your foundation is ready. It contains all major structural components for assembly.
—
Pre-Cut Components
Every beam, post, and brace comes pre-cut to size. Each piece carries labels showing its position and connection points. You’ll know exactly where everything belongs.
—
Hardware and Fasteners
The kit includes bolts, brackets, and metal plates. These connect timber pieces securely. No guesswork needed for joinery.
—
Documentation
Detailed drawings guide you through the build. They show beam placement, measurements, and assembly sequences. Follow them step by step.
—
Additional Materials
Some kits include roofing materials. Others require separate purchase. Check your package contents before starting.
All wood receives weather-resistant treatment. This protects your frame from the elements.
—
Pre-Assembly Tip
Organize components by location before building. This simple step keeps construction moving smoothly.
Hardware and Fasteners: What’s Included, What Isn’t
What’s Included in Your Kit
Most timber frame pavilion kits come with structural bolts, lag screws, and timber connectors. These cover your primary joints and main frame assembly.
What You’ll Need to Source
Builders typically buy deck screws, nails, joist hangers, and metal brackets separately. These handle secondary connections, roofing, and finishing work.
Checking Your Documentation
Kit paperwork lists exact fastener grades and sizes. This ensures your build meets structural standards.
Review these lists against your project plans before starting. It saves time and prevents delays. The right fasteners keep your pavilion safe and sound.
Roofing Materials: Included vs. Not Included
Roofing materials are one of the most variable parts of timber frame pavilion kits. Each manufacturer handles them differently.
Some suppliers ship complete packages with shingles, underlayment, and flashing included. Others provide only the structural framework. Many kits leave roofing out entirely.
You may need to source asphalt shingles, metal panels, or polycarbonate sheets separately. Always check if your kit includes weatherproofing, fasteners, or ventilation.
Budgets can shift dramatically based on your roofing choice. Metal costs more upfront than asphalt shingles. It also lasts longer and stands up better to the elements over time.
Flooring Options and Installation Considerations
Most timber frame pavilion kits come without flooring. Manufacturers usually supply just the frame and roof. You’ll need to choose and install the floor separately.
Common options include pressure-treated wood, concrete, and composite materials. Pressure-treated wood looks natural and costs less. It does need regular upkeep though. Concrete lasts a long time with little maintenance. However, it requires careful site preparation and proper drainage. Composite decking offers a wood-like look with less maintenance. The trade-off is a higher upfront cost.
Several factors affect installation success. Level the ground before starting. Account for frost line depth when setting post footings. Plan for slight slope to direct water away. Check local building codes early in the process.
Take time to evaluate your specific situation. Consider your local climate, available budget, and how you’ll use the pavilion. These factors will guide you toward the right flooring choice.
Understanding Your Assembly Instructions and Blueprints
Builders rely on clear directions to place each timber correctly. Blueprints and instructions provide all the necessary details.
What Blueprints Show
Overhead and side views display each component’s exact measurements. Detailed drawings help builders visualize the finished structure before cutting begins.
Tools and Materials
Instructions list everything needed for the job. This includes saws, drills, fasteners, and safety equipment. Having the right tools on hand keeps the project moving smoothly.
Step-by-Step Guidance
Sequences show timber placement in logical order. Diagrams illustrate mortise-and-tenon joints, post placements, and beam arrangements. Color-coding identifies different timber types and sizes throughout the plans.
Labels and References
Each component receives a specific name and location marker. Builders check these labels often during construction.
Why Clear Documentation Matters
Accurate plans reduce errors and save time. They ensure proper alignment and structural integrity from start to finish.
Tools and Equipment You’ll Need to Buy Separately
Blueprints show you where each timber goes, but you’ll need your own tools to cut, drill, and put everything together.
A circular saw or miter saw handles the lumber cuts. You’ll also want a drill-driver for holes and bolts, plus a level to keep everything straight. Grab a tape measure, carpenter’s square, and pencil for marking lengths accurately. Clamps keep pieces steady while you work, and a socket set tightens all the hardware.
Don’t forget safety gear. Work gloves, safety glasses, and dust masks protect you from splinters and sawdust. Most kits only include structural parts, so plan to buy these tools separately.
Size, Style, and Brand: Comparing Kit Variations
Size Options
Pavilion kits range from compact 8×8 foot models to spacious 20×20 foot designs. Small sizes work well for intimate seating areas. Larger models accommodate full outdoor dining sets and entertainment spaces.
Styles to Consider
Traditional A-frame structures evoke classic garden charm. Modern rectangular designs offer clean, contemporary lines. Octagonal configurations create unique focal points in any yard.
Brand Comparisons
Backyard Discovery, Yardistry, and Cedar Valley each bring different strengths to the table. Quality levels and price points vary significantly between manufacturers. Cedar kits command higher prices than metal or vinyl alternatives. Warranty terms, hardware quality, and wood grades differ by brand. Assembly complexity also shifts from one maker to the next.
Making Your Choice
Start by defining your intended use and measuring available yard space. Set a realistic budget that includes potential foundation costs. Compare specific features across multiple brands before deciding. The right pavilion kit balances your practical needs with your personal style preferences.
Optional Add-Ons: Screens, Lighting, and Customization
Screening options help you enjoy the outdoors without the bugs. Mesh panels keep insects out while letting you see the views around you. They also allow gentle breezes to pass through.
Lighting upgrades let you use your pavilion well into the evening. Basic overhead fixtures work for casual gatherings. Integrated LED systems create a more polished look and better illumination for nighttime entertaining.
Roof materials, flooring choices, and structural reinforcements tailor your pavilion to your climate and style. Electrical packages, ceiling fans, and heating elements add comfort across seasons.
Built-in benches save space and create a natural gathering spot. Storage compartments hide cushions and supplies. Decorative railings complete the look while adding safety.
Each addition affects your budget and installation timeline. Weigh your priorities before finalizing your order.
Real Timeline and Hidden Costs: The Full Picture
Many buyers focus only on kit prices. They miss the expenses that pile up before and after building starts.
Foundation work, permits, and labor add major costs beyond the kit itself. Site clearing often needs professional excavation.
Construction usually takes four to eight weeks. Crew schedules and weather can stretch this timeline.
Homeowners frequently face surprise costs. These include concrete footings, better hardware, and finishes like stain or sealant.
Delivery fees, equipment rentals, and inspector charges pile on more. Knowing these hidden costs keeps your budget on track.
Frequently Asked Questions
Do Timber Frame Pavilion Kits Come With Warranty or Guarantee Coverage?
Timber frame pavilion kits typically include warranty coverage ranging from one to five years, depending on the manufacturer. Most warranties cover structural defects and material flaws, though coverage specifics vary by vendor and product line.
Are Permits and Inspections Included or Handled by Kit Manufacturers?
Permits and inspections are typically the buyer’s responsibility, not included with kit manufacturers’ offerings. Most manufacturers provide design documentation to assist with permit applications, but local jurisdiction requirements and inspection processes remain the purchaser’s obligation to navigate and complete.
Can I Modify the Kit Design After Purchase Without Voiding Warranty?
Most manufacturers permit “creative customization” of their designs post-purchase, though substantive structural alterations typically necessitate warranty reconsideration. Buyers should consult their specific warranty documentation and contact the manufacturer directly before implementing modifications to guarantee coverage preservation.
What’s the Typical Lifespan and Maintenance Schedule for Timber Pavilion Kits?
Timber pavilion kits typically last 20-30 years with proper maintenance. Annual inspections, sealing every 2-3 years, and prompt repairs of damaged wood extend longevity. Regular cleaning prevents debris accumulation and moisture damage.
Does the Kit Price Include Delivery and Assembly Labor Costs?
Kit prices typically exclude delivery and assembly labor. Buyers usually pay separately for shipping costs and professional installation services. However, some manufacturers offer bundled packages combining materials with delivery and labor options for additional fees.
Conclusion
Timber frame pavilion kits provide essential structural components and hardware, yet buyers must budget for additional materials. The theory that kits offer complete solutions proves partially false; deck screws, flooring, roofing details, and tools require separate purchases. Verification of included weatherproofing and ventilation items prevents costly oversights. Success depends on understanding kit limitations, comparing brands carefully, and planning for hidden expenses beyond the base package price.