
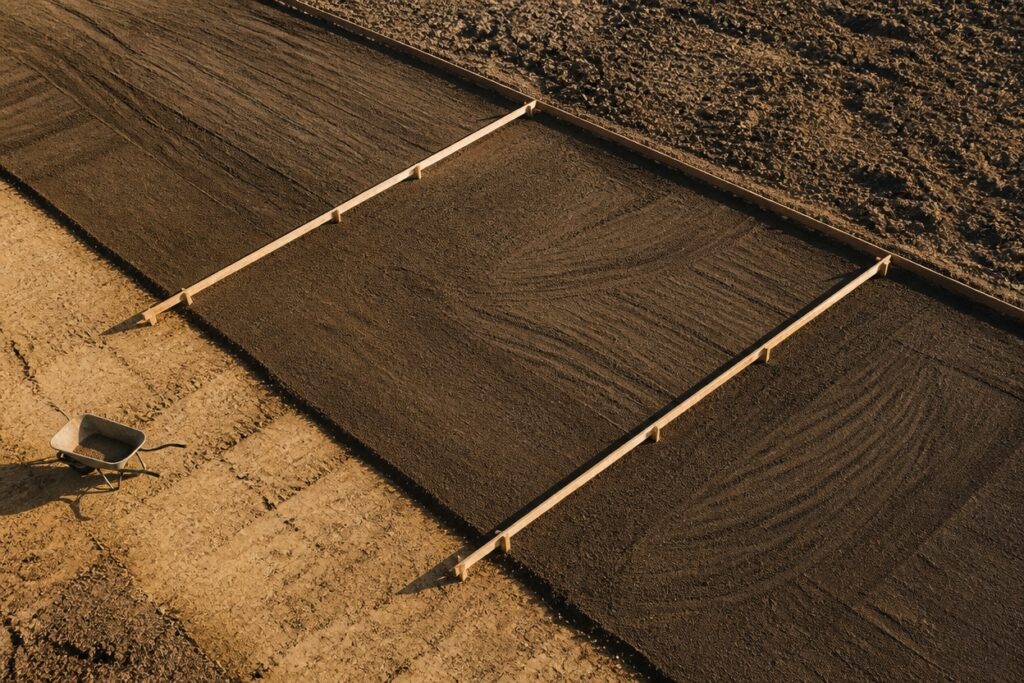
A solid concrete slab starts with what you cannot see. The ground beneath your feet matters just as much as the finished surface above. Taking time to prepare it properly saves headaches years down the road.
Begin by clearing the area completely. Remove grass, roots, and any debris that could shift or decompose. This clean slate lets you assess what you are really working with.
Next comes the technical work. Compact the soil, add a gravel base for drainage, and consider a moisture barrier if your climate calls for it. Each layer has a purpose, and together they keep cracks and water damage at bay.
Rushing this stage is tempting, especially when you are eager to pour. But patience here pays off.
A well-prepped foundation means your slab stays level and strong for decades.
Prepare Your Ground: Assess Soil and Drainage
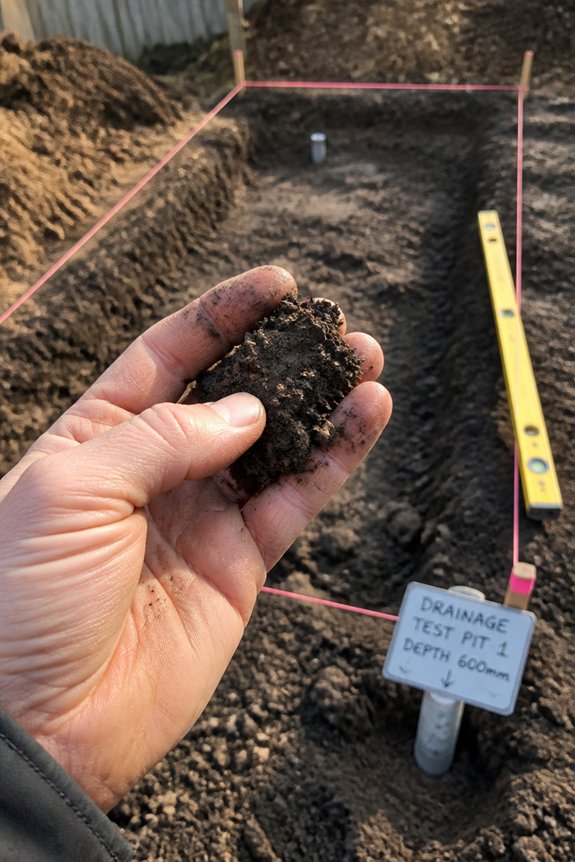
Several factors determine if a concrete slab will last. Soil assessment ranks among the most critical.
Builders must evaluate soil composition. Check for clay, sand, silt, or organic matter. Each affects stability differently.
Compacted soil supports slabs far better than loose, disturbed earth. Drainage matters just as much. Water pooling beneath concrete causes foundation problems, cracking, and deterioration.
Look for low spots, underground springs, or poor water flow. Catching these early prevents future headaches.
Test soil density and moisture levels before construction begins. This guarantees adequate preparation.
Proper grading directs water away from the slab area. This simple step protects structural integrity and helps your concrete last for years.
Clear the Site of Vegetation and Debris
After evaluating soil and planning drainage, it’s time to clear the site. Workers need to remove all vegetation. This includes grass, weeds, shrubs, and trees. Roots can interfere with slab stability, so thorough removal matters.
Debris removal comes next. Collect rocks, concrete chunks, wood, and metal scraps. Construction waste needs to go too. Heavy equipment like excavators works well for large areas. They strip vegetation quickly and move debris to disposal sites. Smaller sites with minimal overgrowth suit hand tools better.
Proper clearing brings real benefits. It prevents settling issues down the road. Pests find fewer places to hide. Concrete placement stays even and reliable. The final result should be bare soil. Compact it well and level the surface. Now the site stands ready for the next preparation stages.
Create the Right Slope for Water Runoff
Proper drainage starts with the right slope on your concrete surface. Aim for at least one-eighth inch per foot. This prevents water from pooling and causing damage over time.
Most contractors slope surfaces away from buildings. They direct water toward drains or designated runoff areas. Keep the slope gradual and even across the entire slab.
A slope that is too steep looks uneven. It can also create tripping hazards. Use a laser level or transit to get accurate measurements during prep work.
Compacted base material helps maintain the slope over time. Well-sloped surfaces last longer. They also prevent standing water, ice buildup, and structural issues.
Compact the Soil to the Right Density
Compacting the soil creates a stable foundation. It resists settling and shifting under the concrete slab’s weight. Proper compaction reduces air pockets and increases density. This prevents future cracking and displacement.
Workers choose their tools based on the job. Plate compactors, hand tampers, or vibratory rollers each suit different area sizes and soil types. Sandy soils need different methods than clay soils. The goal is 95 percent of maximum density. Multiple passes over the same area achieve this.
Testing equipment like density gauges confirms the job is done right. Inadequate compaction causes uneven settling. This compromises concrete integrity and shortens its lifespan.
Add and Level Your Gravel Base Layer
Once the soil is properly compacted, it’s time to add the gravel base layer. This layer sits directly on your prepared ground. It should be four to six inches thick.
The gravel provides drainage and helps prevent concrete cracking later on. Crushed stone or pea gravel both work well for this step. Choose whatever material is readily available in your area.
Spread the gravel evenly across the entire surface. Use a straightedge or screed board to level it carefully. This step matters because it ensures your concrete slab will have consistent thickness throughout.
Keep in mind that gravel compacts slightly under the weight of wet concrete. You may need to add extra material to maintain proper depth right before pouring. Check your levels one last time to be sure.
Protect Your Base With Moisture Barriers and Edging
Once your gravel base is level, two simple steps will protect your concrete from moisture damage and give you clean, crisp edges.
Start by laying a moisture barrier across the entire surface. Polyethylene sheeting works well for this. It stops water from wicking upward through capillary action. Without this barrier, your concrete will eventually discolor and weaken.
Next, set up your edging forms around the perimeter. You can use lumber, metal stakes, or plastic barriers. These forms hold the concrete in place and keep the thickness uniform. They also prevent messy spillover during the pour. Make sure to secure them tightly so they stay straight and at the right height.
These two steps take little time but make a big difference. Your concrete will last longer and look professionally finished.
Check and Finalize Surface Before Pouring
A final inspection ensures your surface is ready for concrete. Check that the ground is firm, compacted, and level across the entire area. Look for soft spots, rocks, or debris that could weaken the slab.
Verify your moisture barrier stays intact and sealed at every edge. Confirm drainage patterns will prevent water from pooling underneath. Use stakes and string lines to check that surface elevation matches your design specs.
Fill any low areas with extra base material. Remove or grind down high spots as needed. This careful verification protects your investment and helps your concrete slab perform well for years to come.
Avoid These Setup Mistakes Before Pouring Concrete
Common Setup Mistakes That Ruin Concrete Slabs
Even careful prep work can’t save a slab from basic setup errors. Poor subgrade compaction leads to uneven settling. Cracks and surface problems follow quickly.
Bad drainage planning traps water under the slab. That moisture slowly weakens the entire structure.
Missing vapor barriers let soil moisture seep upward into the concrete. The damage shows up months later.
Formwork mistakes create wavy edges and thin spots. These weak points fail first under load.
Ignoring soil conditions is asking for trouble. Expansive clay and poor bearing capacity both cause foundation failure.
Contractors should check compaction density and inspect drainage before any concrete goes in. Barrier placement and soil composition need verification too.
Frequently Asked Questions
How Long Does Ground Preparation Typically Take Before Pouring Concrete?
Ground preparation typically takes one to three days, depending on site conditions, soil type, and slab size. Proper excavation, compaction, and base layer installation require careful attention to guarantee a stable foundation for concrete placement.
What’s the Ideal Depth for a Gravel Base Layer Under Concrete Slabs?
The ideal gravel base layer depth typically ranges from four to six inches for most concrete slabs. This depth provides adequate drainage and compaction while supporting the slab’s structural integrity and preventing settling issues.
Should I Hire a Professional or Can I DIY Ground Preparation?
DIY ground preparation is feasible for small projects if one possesses basic tools and physical capability. However, professionals guarantee proper compaction, grading, and drainage—critical for slab longevity. Complex sites warrant expert assessment.
How Much Does Proper Ground Preparation Cost for an Average Slab?
Ground preparation costs typically range from $0.50 to $2.00 per square foot, depending on soil conditions, site accessibility, and local labor rates. A 1,000-square-foot slab averages $500 to $2,000 for professional preparation work.
What Equipment Do I Need to Rent for Soil Compaction?
A contractor preparing a 500-square-foot residential patio typically rents a plate compactor or vibratory roller. For smaller areas, a hand tamper suffices. Larger projects require walk-behind compactors. Rental costs average $50–$150 daily depending on equipment type and regional availability.
Conclusion
Proper ground preparation prevents a million future problems, making it the foundation’s true foundation. Evaluating soil, clearing debris, sloping surfaces, compacting earth, adding gravel, and installing moisture barriers create stability. Skipping these steps invites settling, cracking, and water damage. A well-prepared base guarantees concrete longevity and performance, protecting the investment through years of use.